Best Solar Panels in India 2026: Topcon, HJT, Bifacial, N-Type Explained

Best Solar Panels in India

Whenever we go to the market to buy solar panels, we get completely confused about which solar panel we should buy, how many watts we need, which technology is better. Apart from that, there are so many other questions in our mind about which we have zero knowledge.

Whenever we install a solar system, the most important part of the entire system is the solar panel. If you don’t select the right solar panel, then no matter how good the rest of the system (inverter, battery, wiring) is, it’s of no use.

That’s why when people decide to install solar, the top 5 questions they ask the most are the ones you should definitely know about.

1st most important point: Efficiency of solar panel

When you buy a solar panel, you must have seen it written on the panel — efficiency 14%, 15%, 20%, etc. What does this mean? Out of all the sunlight that falls on the panel, how much percentage of it is getting converted into electricity — that percentage is called efficiency.

2nd point: P-type vs N-type

Nowadays you hear the word N-type almost everywhere. Earlier it used to be mostly P-type, and many times they didn’t even mention it, just gave you the panel. Technically it’s a bit long to explain, but simply remember:

  • P-type → old technology
  • N-type → new & improved technology

N-type panels are much more efficient compared to P-type. The problems/weaknesses that were in P-type have mostly been removed in N-type.

But that doesn’t mean P-type panels are completely useless today. They had their time. Right now the latest panels coming in the market are almost all N-type. So just keep one thing in mind, whatever panel you buy today, make sure it is N-type.

3rd point: Watt rating

Since we buy solar panels to generate electricity, everything depends on how many watts the panel produces. For example: You see 500W, 540W, 550W panels in the market. If you want to install a 2 kW solar system, then you’ll need roughly four 540W panels (4 × 540 = 2160 W ≈ 2 kW+). So always calculate according to your required system size.

4th point: DCR vs Non-DCR

This is very simple to understand.

  • DCR (Domestic Content Requirement) → panels manufactured in India
  • Non-DCR → either fully imported or cells imported & assembled here (still counted as Non-DCR)

If you want subsidy under PM Surya Ghar Yojana (or any government scheme), then only DCR panels are eligible. Government is promoting Make in India, so they don’t give subsidy on imported / Non-DCR panels. So if subsidy is important for you → must buy DCR panels only.

5th point (most important — saved for last): A-grade vs B-grade
I’ll explain this at the end because it’s very critical.

Now let’s understand different types of solar panels in very simple language.

Evolution of solar panel technology (for home use):

  1. Polycrystalline (first type, blue colour)
    • Efficiency: 13–16%
    • Oldest technology
    • Almost disappeared from market now
  2. Monocrystalline
    • Efficiency: ~16–18% (2–3% better than poly)
    • Better temperature handling
    • Black colour mostly
  3. Monoperc (PERC technology added)
    • Efficiency improved again (~1–1.5% more)
    • Cells improved → better performance
  4. Monoperc Half-cut
    • Big improvement: cells are cut in half → panel divided into two electrical parts
    • Advantage: If shadow/dust falls on one half, the other half still works at full capacity
    • Earlier full-cell panels — even small shadow on one cell could reduce entire panel output drastically
    • Now you see 144 half-cells instead of 72 full cells
  5. Bifacial (mostly comes with half-cut now)
    • Generates power from both front and back side
    • Front: 100%
    • Back: ~70% (albedo light — reflection from ground/roof)
    • Easy to identify: back side also looks like solar cells (not white sheet like normal panels)

So latest common name you hear today:
Monoperc Half-cut Bifacial N-type

  1. Topcon (Tunnel Oxide Passivated Contact)
    • Even more advanced than previous
    • Higher efficiency, higher wattage in same size (550–700 W common now)
    • Usually N-type + Half-cut + Bifacial + Topcon
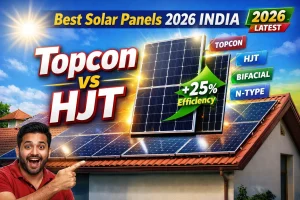
  2. HJT (Heterojunction Technology) — latest of all (2024–2026 period)
    • Efficiency: 23–23.5%+ (highest so far)
    • Very high wattage panels starting from 700–750 W already
    • Still expensive & mostly imported in India → used more in commercial projects
    • In future expected to reach 1 kW per panel

Quick summary: What should you buy in 2025–2026?

Best realistic choice right now for home users (balance of price, performance, availability & subsidy): Topcon Half-cut Bifacial N-type DCR panels (550–700W range)

HJT is superb but still costly and less available in DCR.

Most important: A-grade vs B-grade

This is the point many vendors never tell you.

  • A-grade: Perfect panel, no manufacturing defect, gives 100% rated output
  • B-grade: Some manufacturing defect (example: one cell damaged, spot on glass, etc.), output slightly less (maybe 3–10W less per panel)

B-grade panels are sold cheaper. Vendors push them without telling. Over time their efficiency drops faster, long-term loss for customer.

How to check?

  • Ask for flash test report (IV curve graph)
  • Good companies stick the flash report graph on back of panel or give copy inside box
  • Insist on A-grade only

Popular Indian brands right now (DCR eligible): Adani, Tata Power Solar, Waaree, Vikram Solar, Renewsys, etc.

Always cross-check price online + local market + company website. Don’t fall for very cheap “deal,” usually old stock or B-grade.

3kW Solar System Cost in India 2026: Real 4 Month Experience, Subsidy, EMI and Electricity Bill

3kW solar system in India guide

For the last four months, a 3 kW solar system has been in use at home, so sharing a complete experience and review. This includes how the bank loan process works, what documents are required, EMI details, subsidy timeline, and a few practical things that only become clear after installation.

Solar usually makes sense for households where the electricity bill is above ₹1000 to ₹1500 per month. Earlier, during summer months, the bill used to touch ₹4000, and in normal months it stayed above ₹1500. Because of that, installing solar felt like a practical decision. Instead of paying the electricity bill every month, the idea was to pay around ₹2000 EMI and own a solar system.

Applying for solar

Applications are done through the PM Surya Ghar Yojana portal. The process is online, but in reality most of the work is handled by the local distributor. Once contacted, they usually guide through the entire process.

Before deciding, enquiries were made with other companies including Tata and Truzen. Finally a local installer was preferred because service and support are easier when the company is nearby.

Cost of the 3 kW system

The total cost for this 3 kW solar setup was around ₹2,10,000.

  • Loan taken: ₹1,89,000
  • Cash paid: ₹21,000

The amount someone pays directly depends on their loan eligibility. Full payment is not compulsory.

Some installers offer systems between ₹1.8 lakh and ₹2.1 lakh. Price differences usually depend on the type and quality of panels used.

Bank loan process

After applying on the PM Surya Ghar portal, the next step is applying for a bank loan. At present, loans for this scheme are mainly provided by government banks like Indian Bank and Indian Overseas Bank.

The process usually takes 2 to 3 days if all documents are ready.

Required documents include:

  • Aadhaar card
  • PAN card
  • Own house proof

Solar under this scheme can only be installed on an owned house. It cannot be installed on rented houses. Also, the loan must be applied in the same name as the electricity bill holder.

At the bank, an account is opened and loan forms are filled. Around 40 to 50 signatures may be required during the process.

After that, bank officials visit the house for verification. They check whether the property is owned and also take photos of the location where solar panels will be installed. Once verification is completed, the loan is usually sanctioned within 4 to 5 days.

The loan amount is transferred directly to the solar distributor’s account, while the government subsidy is credited to the customer’s bank account.

Installation details

Once the loan is approved, installation starts quickly.

In this case, Polycab materials were used along with premium bifacial solar panels. Bifacial panels generate electricity from both sides, which helps improve overall output.

One important suggestion during installation is about the panel structure height. Many installers offer a 6 x 4 structure, which sits lower on the terrace. But installing a higher 8 x 6 structure is better if space allows. A higher structure keeps the terrace usable and prevents the entire roof area from being blocked.

It is also better to clearly discuss the following things with the installer before paying:

  • Structure height
  • Panel type
  • Cement support blocks for pillars

Once payment is done, negotiating later becomes difficult. Getting the details written clearly helps avoid confusion.

Smart meter installation

After the solar setup is completed, the electricity department installs a smart meter. The old meter is removed and replaced with a new one. The service number remains the same and electricity billing continues as usual.

Once the smart meter is installed, the solar system starts functioning.

On grid solar behaviour

This system is on grid solar. One important thing to understand is that solar generation happens only when grid electricity is available. Even if sunlight is strong, the panels will not operate during a power cut.

Off grid systems work differently because they include batteries, but they are more expensive. Hybrid systems combining both technologies are also available now, though they cost more.

Monitoring power generation

The installer provides a mobile app where solar generation can be checked.

Through the app it is possible to track:

  • Daily power generation
  • Monthly unit generation

At present, with mixed weather conditions and some rainfall, the system generates around 380 to 400 units per month. During peak summer the highest daily generation recorded was 19 units in one day.

Keeping the panels clean is very important. Dust collects on rooftop panels and affects output. Cleaning them once a week with water helps maintain good power generation.

Subsidy timeline

The government subsidy was credited within about 45 days directly to the bank account. That amount was used to reduce the loan balance.

Subsidy timelines may vary depending on government processing. Sometimes it may come earlier, sometimes later.

First electricity bill surprise

After installing solar, many people expect the electricity bill to become zero immediately. But the first bill can be around ₹4500 because the cost of the smart meter installation is included in that bill.

From the next month onwards the bill reduces significantly, but it does not become completely zero.

Even with solar installed, there are still fixed charges and FCA charges. These charges come to around ₹300 to ₹350 per month.

Earlier these charges were around ₹150 to ₹160, but they increased later. Because of this, even solar users continue to receive a small monthly bill.

So expecting a completely zero electricity bill may not be realistic. Energy charges become zero, but other charges still remain.

EMI and loan repayment

The EMI initially was ₹2195, but after the RBI repo rate reduction, the interest dropped and the EMI reduced to around ₹2000.

After adjusting the subsidy amount, the remaining loan repayment period is around 4.5 years.

The bank app clearly shows:

  • EMI amount
  • Due date
  • Loan balance

Timely repayment is important because it affects the CIBIL score.

Overall experience after four months

The main reason for installing solar was a monthly electricity bill above ₹1500. Solar panels typically have a life of around 25 years, while the loan gets cleared within about five years. The expectation was that the remaining years would bring long term savings.

However, because of fixed charges of around ₹300 to ₹350 per month, the bill never becomes completely zero. Earlier the higher bills mostly came during summer months. Now the bill stays small but consistent every month.

Apart from that, the system has been working well. In the first four months there have been no technical issues with the solar panels or installation.

Extra unused solar units are supposed to be settled every three to six months, according to the distributor. Whether the amount actually gets credited depends on the electricity department and settlement cycle.

Final thoughts

Solar can still be a good option for homes with consistently high electricity bills, especially above ₹1500 per month. But it is better to install it with realistic expectations.

The electricity bill may reduce a lot, but some monthly charges will still remain. Proper installation, good panel quality, and regular cleaning make a big difference in performance.

The installation discussed here was done in AP and this review reflects the experience after using the system for about four months.